


Da Bloody Skull Boyz: WIP 2
Last post, we saw what went into making the first piece I completed for my 500 point escalation army; the ork trukk. What is a trukk without some boys, though? I was biding my time, waiting for the holidays to end, so I could do some massive ork buying. That was when my #plasticfriends at my local Warhammer store surprised me with this!
 The ideas that I have, for all of this, are far too many to go into detail here (and I don’t want to give spoilers! You are just going to have to keep reading my blog :P). The battleforce is amazing for my project, being literally a kult of speed box. The skulls will definitely come in handy, as you will soon see, and the servohaulers… that is for another day 😉 We will discuss the boyz first, as they were a fairly simple build to do, have a lot of personality and turned out great for this project.
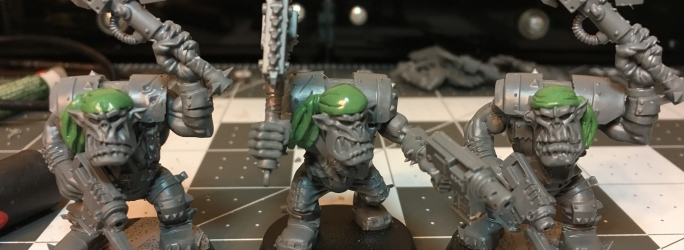
 The first five assembled can be seen above. I took a page from my freebootaz and used savage orc heads. I was able to cut the tongues off, for some, though most were used in my freebootaz. The rest I had to sculpt with greenstuff, as the empty mouth looked odd. I also used arms from the savage orc kit, giving some of them spears. My thought in this was to outfit them with things to throw from the back of the trukk. Rules wise, they will just be choppas, but I thought they added a bit to the character of these orks. While having vehicles, I wanted to paint a picture of borderline savage orks. I imagine this tribe on a world like Gorkamorka, working with a bare minimum amount of technology. The orks on the left received loin “cloths” from the nob kit, and the front most received a Mohawk from the Necromunda Goliath kit.
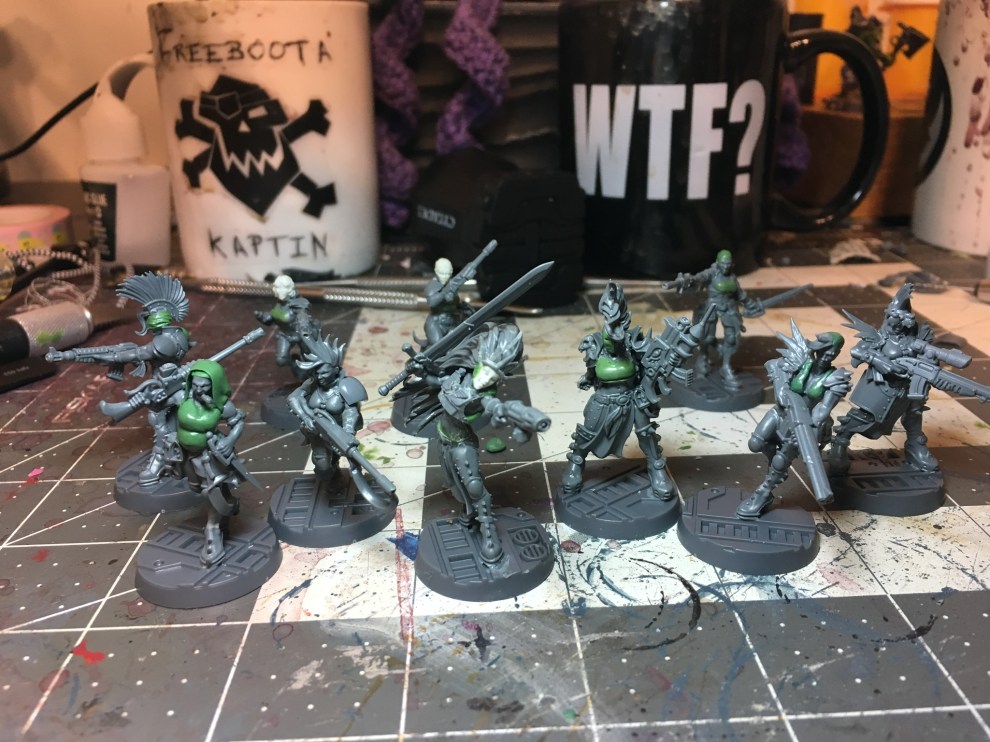
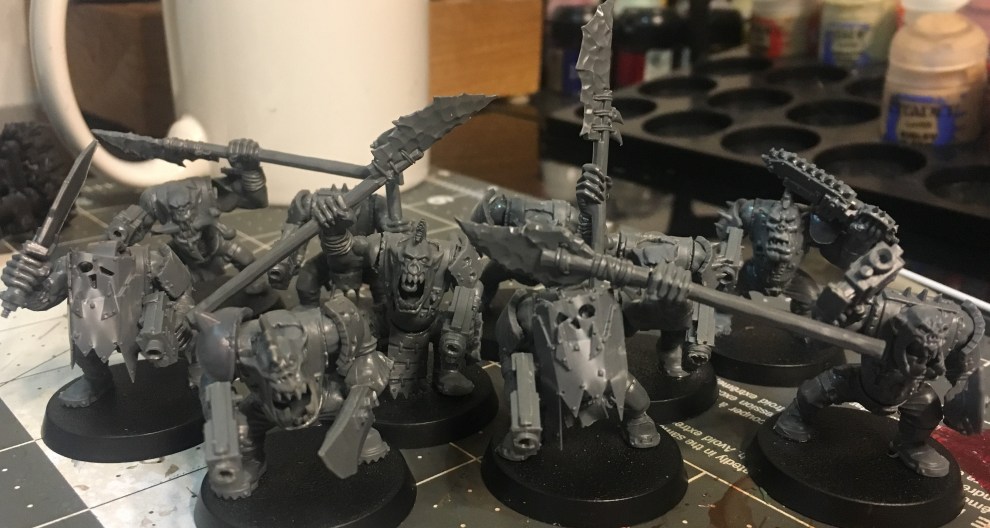 I fleshed this group of ten out even further when working on the last five. More spears were brought in, plus some plating for their arms (from the nob kit). Another Mohawk was fashioned, this time from the back spine of a bloodletter. I had some black orc shields that I thought would make great masks. I added them to the heads of two orks, using the thin plates from the nob kit as a top strap. All boyz went on 32mm bases. The stances they have just are too wide for the 25mms they come with. they look silly on them, compared to the 32mm bases.
The bikes I did up were fairly easy and straight forward, as well. Most simply saw a swapped out front.
 The first three bikers can be seen above. The chassis are all the same, using the core warbiker box, for these. The main change is the use of Deff Dread bits for the front. Each one came from that kit, which I now feel works perfectly for bikes. The bosspole for the Nob biker also came from that same kit. Bodies and rider arms on the regular bikers are from the normal bike kit. The nob biker arms came from the Nob kit, while the head is from numerous areas. The main head came from the flash gitz kit, while the gob was made from 3 separate pieces, cut from the shoulder decorations from Orruk brute kits. The spike Mohawk was fashioned from spikes on one of the ork boy kit shoulder pads.

Shown without spears.
More Deff Dread bits went into making the second set of bikes, utilizing the shoulders this time. The rounded piece from the servohauler grill, used for my buggy (which will have it’s own WIP writeup) was filed and placed ontop of one deff dread shoulder, while the other bike received two placed together. The third bike receive the top portion of the big clawfiend skull from the skull kit, which later received jewelers chain to make it look secured. The spears were fashioned using thin plastic rod and skulls from the skulls kit. Using a pin vice, I drilled holes into the top of each skull to allow them to slide snuggly onto the spear. The tips of the spears were just whittled to a point with a hobby knife.
Next post I will be going into the last bit of my 500 points; my scratch built warbuggy. Until then, thanks for reading
– Soph ❤

 add the supports for the tracks, as seen in the picture above, I eventually chose to remove them. They did not work quite as well as I had hoped, for putting the wheels on.
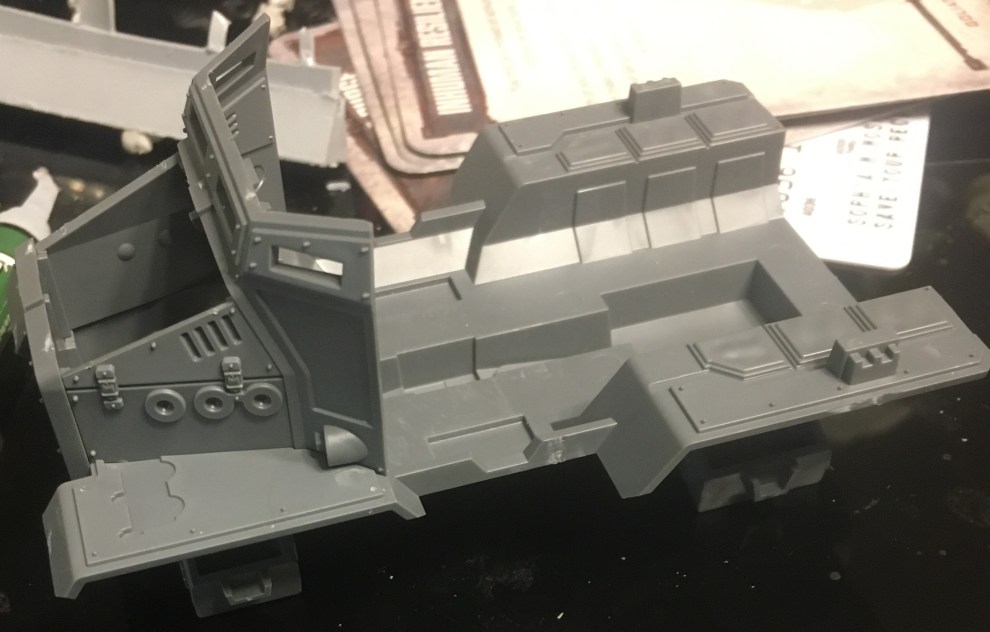
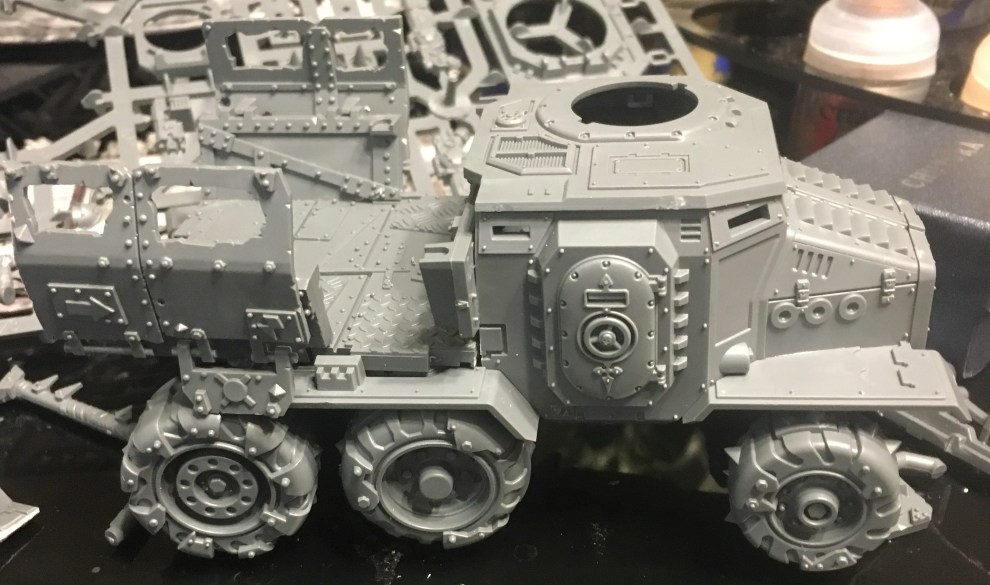 These two kits, at times, seemed like they were made for one another. I had to shave the bottom of the ork trukk bed, but ultimately it fit on surprisingly well. The trukk bed was built per the kit, with the front of the bed used to seal off the back of the cab, built to taurox kit standards, as well. The wheels were mounted on using the axels/frame of the ork kit. I shaved down the rounded center, to sit flush against the undercarriage. The whole build ended being a little longer than the original ork trukk, so I needed to use some plastic rod to connect the front wheel axel to the rear wheels.
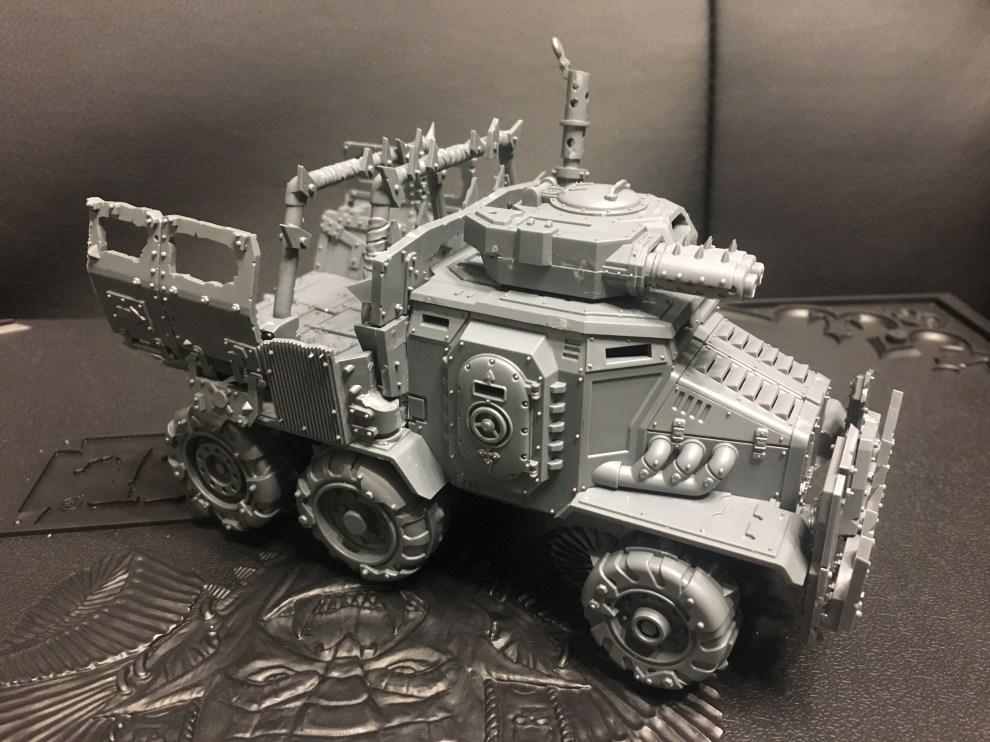 I added the standard piping to the taurox and gave it the ork trukk smoke stack on the side. I used two big shootas from the deff dread kit (I think that’s where they came from) and cut them to fit the turret hatch on the top of the taurox. For the back of the trukk, I added the roll cage bars, filled the gaps on the sides by cutting the corrugated trukk bit in half and shaving the ends down enough to fit against the sides. The hardest bit was the top half of what I used for the back of the cabin. The top of the taurox cabin has a lip in the back, so I had to cut the piece so that it could slide in with the lip inserting into it.
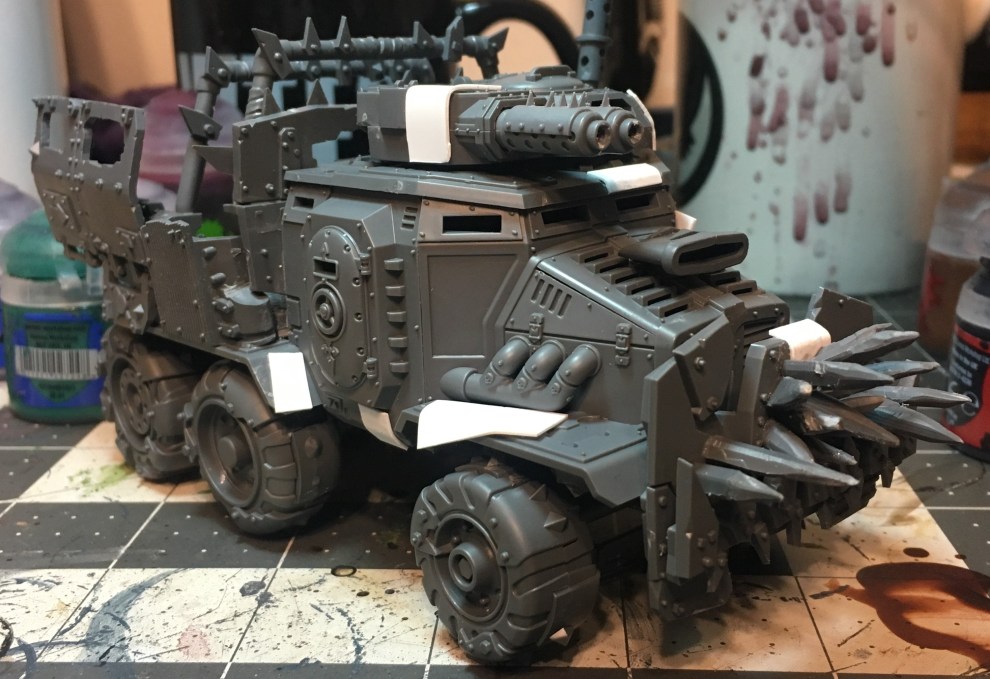 Let’s be honest; that taurox front was too clean looking 🙂 So I cut up some plasticard to act as metal sheeting, and glued it across the front, in patches. Cutting the vent off the top of the ork trukk kit engine, I fixed it into the hood by cutting a slot just big enough for the end to slide into. The spikes were made out of leftover sprue, cut and whittled into spikes as I watched Gremlins 2 to pass the time.
 The next step was extremely tedious, but I feel the outcome is well worth it. I used very thin plastic rod and sliced it to make very thin wafers. These served to be my rivets for the plasticard sheeting I added. I went through and glued them, in different densities, to each one. Through each panel, I also drilled a hole here and there, where a rivet should be. It is a nice way to break up the monotony of the task, and it looks like a rivet has fallen out, adding some character to the piece.
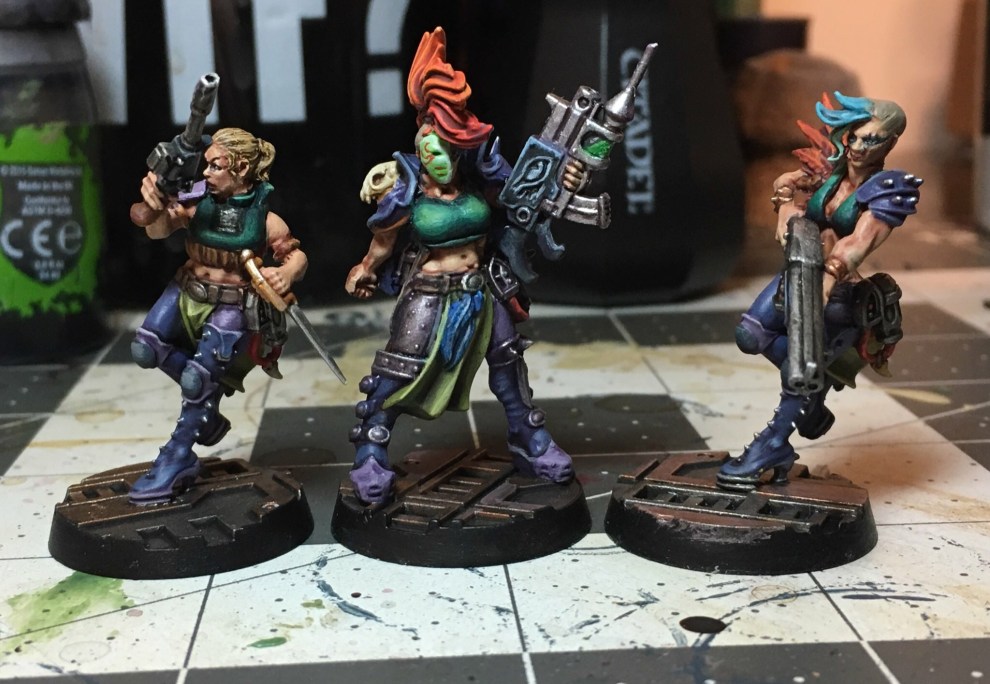
 I decided to start with my Tank Girl inspired ganger, aptly named Buck (Tank Girl’s name being Rebecca Buck). As a side note, it made me happy to be able to arm her with a shotgun, going for the double reference. Buck helped flesh out a lot of the gang color standard that you will see through the rest of the models. There are four standard transitions that I used here; skin, chest, boots/shoulder, and pant/knee colors. The boots and shoulders, except on a couple models, all receive the same color progression. I started with a base coat of The Fang, followed by a wash of Druchi Violet. Once dried I highlighted with The Fang once more, followed by Russ Grey for extreme highlight areas.
 waywatcher green, gauss blaster green highlight with evil sunz scarlet for the freehand. The tops/chest armor was a progression of glazing and shading to get the blending seen. Incubi darkness went on as a base, with carroburg crimson going on the under shade area of the chest to give a richer shade. Thin glazes of kabalite green and then sybarite green went on to form gradient highlighting, with coeliac greenshade used to tie in transitions. Skintone started with Bugman’s glow, followed by Riekland Fleshshade as a wash. Cadian Fleshtone started the base highlight, with kislev flesh forming the extreme highlight and, in areas like noses and knuckles, flayed one flesh used for a higher extreme. lips were simply bugmans glow with carroburg crimson washed over.

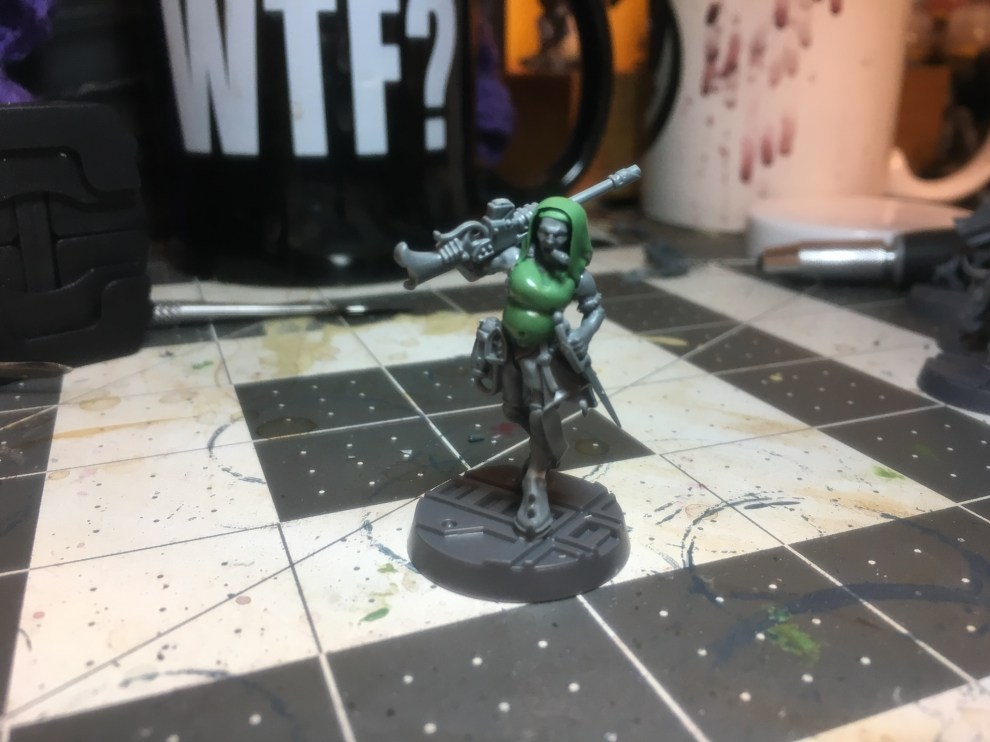
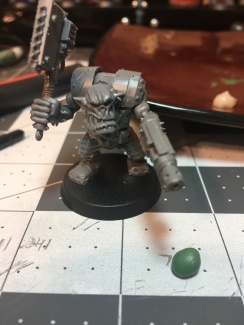
 My champion was next in line for building. I gave her the combibolter that is normally seen on the gang leader, in stock builds, due to a lower cost. While the chem weapon option seems great, I opted to go cheaper and then outfit others with grenades to make up for the loss of template. The build was more straight forward, simply giving the coat and gun to her, while removing the whip. For some added difference, I covered over the chest to unify the plating and decided to give her a half mask. The idea popped that she uses it to cover the scar that she has. Also that if she has a scar like the leader, then it could be something ritualistic within the gang, perhaps a method of removing their penal world identification tattoos.
 I decided to skip to my Juves next. My list called for three of them, so I did them all in a bit of a batch build. These are supposed to be the fresh blood of the gang., so I imagined that they would be pulled from the population on Necromunda and not from the penal world; so no tattoos. Scarring would happen later, if they live long enough to seemembership. To make them seem newer, I used some heads from Victoria Miniatures again, as the hair isn’t as wild as the Escher. Like the champion, I used greenstuff to give more of a cloth look over the chest.
 With assembly and sculpting finished, it was time to finish their story and put some paint on them. Who gets painted first? That is part 3’s job to tell us.
 I started with my leader, who in my mind should be the most flashy model to stand out from the rest. Having done multiple female builds at this point (with write-ups coming, super promise) I had a few options, when it came to bits. My eyes focused on the Age of Sigmar Sorceress model, having picked one up a while back to use for my Amazon team created from witch elves. I thought she could work nicely as a thrower at the time, but slowly the idea faded and she waited on the Warhammer Quest character back burner. The extended arm would work well for holding a pistol out, I had thought, so I started dicing her up and came up with an initial outline. The torso, once sawed off from the Sorceress, lined up perfectly with the Escher legs that were freed from their host. I had wanted to do a segmented leg, to give a different boot look, but the idea didn’t fully pan out and I went
  with the traditional leg for that portion of the kit. I used some greenstuff to do any minor gapfilling needed in order to join the two halves together. The extended arm was simple; I just cut the sorceress arm off at an angle to line up with the end of the glove. I was already falling in love with this pose and it started helping in fleshing out who this person was and what this gang would be like. I envisioned this woman staring down her plasma pistol completely relaxed and uncaring of what layed on the other end. The pose, with head tipped back would lay the foundation for the next ideas to pop in my head; the face. Fortunately, the faces for all the witch elf models are separate from the heads. They are far too angular for a human look, something I ran into when making my Amazon team. I needed something that would work well with this pose and this build. Fortunately, I didn’t have to look far. I had purchased some female heads from Victoria Miniatures to be used for my Sisters of Battle; the Guthrie female heads, to be exact. I had bought them after I learned that Armies on Parade did not allow 3rd part bits, so I had to find another solution. From these heads, I found the perfect head for her.
 The head was smiling, which I thought was a fantastic addition. Now I had this gang leader grinning as she eyes her target. I quickly thought of this mentally deranged gang who were escapees from a penal world, which was building off the generic penal inmate idea I originally had. I wanted to make them look unstable and give some looted gear, like it was lifted off from imperial guards during this escape. I was also leafing through the rulebook and absolutely loved the look of the Belladonna character art they put in there. It became a partial inspiration for where I headed, deciding I wanted a feather headdress for my leader. To build, the head was cut and filed to fit the head with hair being glued in place around it. I had to file down both her chest and the cadian plate piece heavily but after a bit of work, it fit. I also gave it some bullet holes; the blows she would have given the poor guardsman she took it from. The feathers would come from the Tzeentch Acolyte kits. I had them on hand, so it was an easy grab in order to get feathers; nine total. I made a crown from the iron halo from Saint Celestine, as I had a spare sitting around, and sat it overtop the feathers already in place. After the crown, everything else was downhill; a powersword clipped from a Sisters of Silence kit was fit onto her right hand and then I used greenstuff to sculpt the back piece for the vest. I decided to add some scarring on her right cheek and neck, to make her a little more weathered as a ganger. The result:
 A really fun build that took me about three or four days of work to do. I cannot wait to get some paint on her. We have ten others to build, however, which I will show you in part 2. Thanks for reading 🙂
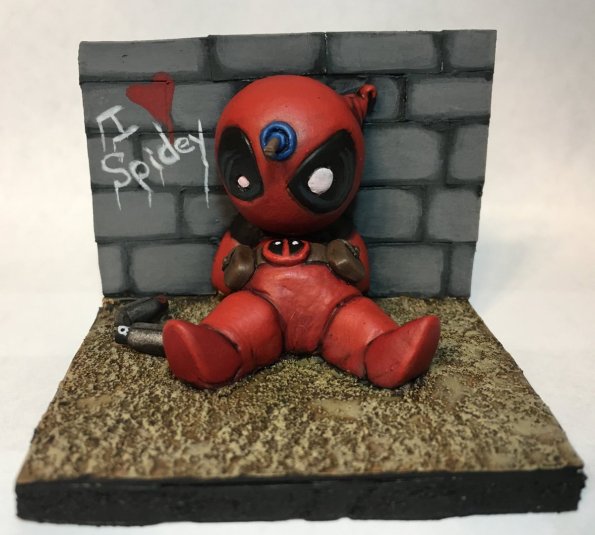
 Not all that long ago, I decided I wanted to test myself and do a project from the ground up; sculpt, base, and paint. I had joined the #boxofmanythings, on twitter, and in my search for something to give my person of the month, I decided this would be a great opportunity to do just that. I decided to do a chibi Deadpool for a few reasons. I had recently become more interested in modeling and painting chibis, I like Deadpool, and I found a cute image as my inspiration, when deciding on what to do.
 some cardboard from a games-workshop box (lizardmen stegadon, to be exact) and some greenstuff. I folded the cardboard into an L to form the ground and wall behind him, and then set the blob of greeenstuff down in the shape of a Y. Once down, I shaped I to form the feet, legs and a portion of the belly before smoothing out all the imperfections (and my finger prints).


 Here we see our ork and his soon-to-be bandana getting acquainted. Once mixed up, pull off a piece of greenstuff and roll it into a ball roughly the size shown; a little under the size of a pea. I never use an exact measurement as it can vary depending on the head you are placing it on. You want enough that it will smoothly cover the head but not look as though they are wearing a pillow. Once you have your ball, mush it right on the top of its head, making sure not to cover the eyes and keeping the coverage even over the entire top of the head.
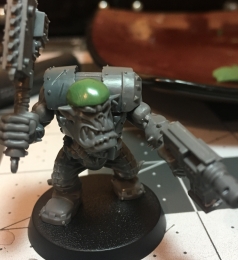


 One end of the diamond shape should be pressed lightly into the back of the knot to connect it, with the rest curved downward. Once in place, separate the piece into what will appear like two tail ends, using your hobby knife, leaving the outer side larger than the inner. Don’t cut all the way though, just score the shape of the outer tail end. This will help create the effect of one end overlapping the other. Press into the bottom of the piece with your knife, connecting with the existing separation to create the tips.
 Using your sculpting tool or shaper, press in on the inner end, flattening it out, while letting the outer tail end remain raised. Make sure that, while you want to flatten the inside end, you also want to maintain the shape of its inner edge. Once flattened, you should see it appear as if the outer end is laying overtop the side of the inner (see picture to the right). With the two ends formed, use your hobby knife once more and lightly press into the center of the outer bandana end, making an oval shape. Once created, use the tip of your tool to even out the newly created crevice, forming the fold.
 At this point, you are mostly done! The final step is to add stretch points into the cap. Fabric would have some creases, being tied into a knot around the wearers head. Using your hobby knife, carefully make a make two or three lines, starting at the bottom of the cap and moving upward, connecting to the knot. The picture on the left shows that, for this example, I chose two lines. Do this for both sides of the knot. Once done, do a final smoothing to remove any lingering finger prints.
